How to Make a Men's Handmade Leather Wallet: A Complete DIY Guide
Learn how to make a durable, custom men
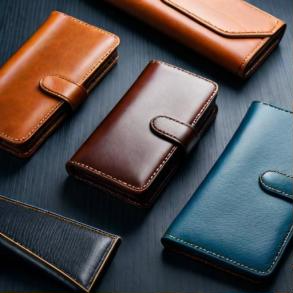
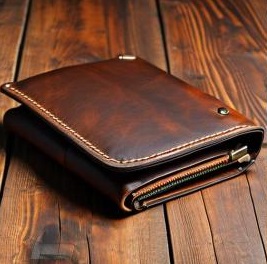
There is something undeniably satisfying about carrying a wallet you made yourself. Not only does a handmade leather wallet offer superior durability compared to mass-produced alternatives, but it also develops a unique patina that tells your personal story over time. Whether you're a complete beginner looking for a weekend project or an aspiring leatherworker, learning how to make a leather wallet is the perfect entry point into the craft.
In this comprehensive DIY guide, we'll walk you through everything you need to know to create a high-quality, custom men's wallet—from selecting the right leather hide to mastering the saddle stitch.
1. Gathering Your Materials and Tools
Before you begin cutting, you need the right supplies. Using quality materials is the secret to a professional result.
Recommended Leather
For a standard bi-fold wallet, Vegetable Tanned Leather is the gold standard. It’s durable, smells amazing, and burnishes (smooths) beautifully on the edges.
- Outer Shell: 3-4 oz (1.2-1.6mm) thickness. This provides structure and protection.
- Inner Pockets: 2-3 oz (0.8-1.2mm) thickness. Thinner leather reduces bulk when layers are stacked.
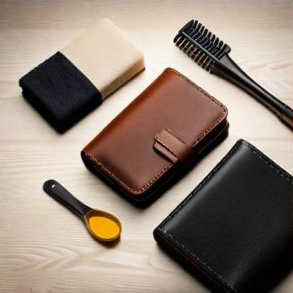
Essential Tools List
- Cutting: A sharp utility knife, X-Acto knife, or rotary cutter.
- Measuring: A metal ruler (cork-backed is best to prevent slipping) and a square.
- Stitching: Stitching chisels (diamond or round dent), two blunt harness needles, and waxed polyester thread (0.8mm or 0.6mm).
- Adhesive: Leather contact cement or water-based leather glue.
- Finishing: Sandpaper (220-400 grit), edge beveler, wood burnisher, and Gum Tragacanth (or water).
- Surface: A self-healing cutting mat and a poly chopping board for punching holes.
2. Designing and Templating
A good wallet starts with a solid plan. You can download free leather wallet patterns online or design your own. If designing from scratch, keep this critical rule in mind: The inner panel must be shorter than the outer panel.
Pro Tip: When a wallet folds, the outer layer has to travel a longer distance around the curve. If both layers are the same length, the inner leather will bunch up and wrinkle. Add about 1/4 inch (6mm) to the length of your outer shell to accommodate the fold.
3. Cutting the Leather
Trace your pattern onto the leather using a scratch awl. Be precise—your cut lines will determine the final shape of the wallet. Using your metal ruler as a guide, make firm, confident cuts. Ideally, try to cut through in one single pass for the cleanest edge, but multiple light passes are safer if you're new to the knife. Ensure your blades are razor-sharp; a dull blade drags and stretches the leather.
4. Pre-Finishing Pocket Tops
Once your pieces are cut, identify the top edges of your card pockets. Once the wallet is assembled, you won't be able to easily burnish these edges. Do it now:
- Lightly sand the top edge of each pocket.
- Apply a tiny amount of water or Gum Tragacanth.
- Rub briskly with a wood burnisher or canvas cloth until the edge is smooth and glossy.
- (Optional) Use an edge creaser to add a decorative line just below the edge.
5. Assembly and Gluing
Now, it's time to build. Start by attaching the card pockets to the inner panel.
- Rough the Edges: Use your knife or sandpaper to "rough up" the grain side (smooth side) of the leather where glue will be applied. This gives the adhesive something to grip.
- Apply Cement: Apply a thin layer of contact cement to both surfaces. Let it dry until tacky (usually 5-10 minutes).
- Press Together: Carefully align the edges and press firmly. Tap the seams with a smooth-faced hammer to set the bond.
6. Stitching Your Wallet
The hallmark of a high-quality handmade leather wallet is the saddle stitch. Unlike a machine lock-stitch, a saddle stitch will not unravel if one thread breaks.
- Marking Stitch Lines: Use wing dividers or a groover to mark a line about 3mm (1/8") from the edge.
- Punching Holes: Place your leather on the punching board. Hold your stitching chisel perpendicular to the leather and strike it with a mallet. Ensure the chisel goes all the way through all layers.
- Saddle Stitching: Thread a needle on each end of a single piece of waxed thread. Pass one needle through a hole, then pass the other needle back through the same hole from the opposite side. Pull tight. Repeat for every hole.
- Backstitch: At the end of your run, stitch backward 2-3 holes to lock the thread. Trim the excess close to the leather and melt the ends with a lighter.
7. Final Edge Finishing
The difference between a "craft project" and a professional product is often in the edges. Once your wallet is stitched, the edges might be slightly uneven.
- Sand Flush: Sand the edges until all layers are perfectly flush and feel like one solid piece of leather. Start with 220 grit and move up to 400 or 600 grit.
- Bevel: Use an edge beveler to shave off the sharp corners of the leather edge. This makes it comfortable to hold and prevents mushrooming.
- Burnish: Apply Gum Tragacanth or water to the edges. Rub rapidly with your burnisher or canvas cloth. The friction generates heat, melting the natural waxes and fibers into a smooth, sealed, glassy surface.
Conclusion
Congratulations! You've just completed your own DIY men's leather wallet. It might not be perfect on your first try, but that's part of the charm. This wallet is a testament to your patience and skill. As you use it, the leather will soften and darken, developing a character that is uniquely yours. Don't be afraid to experiment with different leather types, thread colors, and pocket designs for your next project.
Ready for a new challenge? Try exploring more complex patterns like tri-folds or long wallets next!

Senior leather care specialist at ChicCuir with 15 years of experience in heritage leather restoration.